Installing Dolibarr on your own server is one of the best ways to fully leverage this open-source ERP/CRM software: complete data control, optimal performance, unlimited customization, and substantial savings compared to SaaS versions. The good news is that, contrary to popular belief, Dolibarr installation is quick, accessible to non-developers, and can be completed in under 15 minutes on most shared or VPS hosting platforms.
In this detailed tutorial, we'll walk you through the entire Dolibarr installation process, from start to finish. We'll cover the technical prerequisites, downloading the latest stable version, creating the database, uploading files, configuring permissions, launching the installation wizard, creating the administrator account, and essential post-installation security steps. By the end of this article, you'll have a fully functional, secure Dolibarr installation, ready to be configured for your business.
Technical prerequisites for installing Dolibarr
Before you begin the installation, it is essential to verify that your environment meets Dolibarr's minimum technical requirements. Fortunately, these prerequisites are intentionally modest to allow installation on most hosting providers on the market, including entry-level shared hosting plans.
The web server
Dolibarr works with a standard web server: Apache (version 2.4 or higher) is the most common and best-documented solution, but Nginx (1.18+) and even IIS on Windows Server are also supported. On shared hosting, you generally don't have to make any choices: the web server is already configured and ready to use.
PHP
Dolibarr requires PHP 8.1 as a minimum in 2026, with PHP 8.2 or 8.3 recommended for optimal performance and the latest compatibility. The following PHP extensions must be enabled: mysqli or pdo_mysql (for the database), gd (image manipulation), curl (external API calls), zip (archive management), xml, mbstring, intl, and openssl. Most hosting providers enable these extensions by default.
The database
Dolibarr works with MySQL 5.7+, MariaDB 10.3+, or PostgreSQL 12+. MariaDB is currently the recommended solution for 2026 due to its performance and full compatibility with MySQL. Almost all hosting providers offer one of these databases. Plan for at least 100 MB of storage space for a new installation, and several gigabytes for intensive use with attachment storage.
Disk space and memory
Allow approximately 300 MB for the Dolibarr files themselves, plus the space required for your data and documents. Regarding memory, the PHP limit should be at least 256 MB (memory_limit in php.ini), and the maximum execution time should be 300 seconds (max_execution_time) to avoid timeouts during lengthy operations such as imports or backups.
Choosing the right hosting for Dolibarr
Your choice of hosting directly impacts the performance and reliability of your Dolibarr installation. Three main options are available, each suited to a different user profile and budget.
Shared hosting
This is the most economical option, starting at €3 to €10 per month with hosting providers like OVH, o2switch, Hostinger, Infomaniak, or PlanetHoster. You share a server with other users, which limits performance but remains sufficient for light to moderate use (freelancers, small businesses with up to 5 users). A major advantage: no server technical skills are required; everything is pre-configured.
The VPS (Virtual Private Server)
For more intensive or multi-user use, a VPS offers significantly higher performance starting at €5 to €30 per month. OVH, Hetzner, DigitalOcean, and Scaleway offer excellent VPS solutions tailored to Dolibarr. You benefit from dedicated resources (CPU, RAM, SSD), full root access, and the ability to fine-tune the configuration. However, you must manage the system administration yourself or hire a managed service provider.
The dedicated server or the cloud
For larger SMEs with 20 or more users, a dedicated server (starting at €50/month) or a cloud instance (AWS, Azure, GCP, Scaleway) guarantees optimal performance and immediate scalability. This option requires strong technical skills or a partnership with a Dolibarr managed services provider.
Step 1: Download the latest version of Dolibarr
Go to the official website www.dolibarr.org and click on the "Download" section. Choose the latest stable version (preferably LTS for production use), available in ZIP or TGZ format. In 2026, the recommended version is generally the latest LTS released by the community, ensuring stability and long-term support.
Avoid "beta" or "development" versions for professional use: they are intended for testing and may contain uncorrected bugs. Always choose the latest stable version, which incorporates the latest French regulatory changes and security patches.
Once the ZIP file (approximately 200 MB) has been downloaded to your computer, verify its integrity using the MD5 or SHA256 hash provided on the official website to ensure that no alterations have occurred during the transfer. This is a good security practice, especially if you are installing Dolibarr in a production environment.
Step 2: Create the MySQL/MariaDB database
Before uploading your Dolibarr files to your server, you need to create a dedicated database. On shared hosting, log in to your administration panel (cPanel, Plesk, OVH manager, etc.) and go to the "Databases" or "MySQL" section. Create a new database and name it, for example, "dolibarr_prod" or "my_company_dolibarr".
Next, create a MySQL user specifically for this database, with a strong password (at least 16 characters, including uppercase letters, lowercase letters, numbers, and special characters). Grant this user full privileges on the newly created database: SELECT, INSERT, UPDATE, DELETE, CREATE, ALTER, INDEX, and DROP. Carefully note the database name, username, password, and host server (usually localhost); you will need this information during the configuration step.
On a VPS, you can create the database via the MySQL command line:
mysql -u root -p
CREATE DATABASE dolibarr_prod CHARACTER SET utf8mb4 COLLATE utf8mb4_unicode_ci;
CREATE USER 'dolibarr_user'@'localhost' IDENTIFIED BY 'your_secure_password';
GRANT ALL PRIVILEGES ON dolibarr_prod.* TO 'dolibarr_user'@'localhost';
FLUSH PRIVILEGES;
Using the utf8mb4 character set is essential for properly handling special characters, emojis, and foreign languages in your data.
Step 3: Upload the Dolibarr files to the server
Unzip the ZIP file downloaded in step 1 on your local machine. You will get a folder "dolibarr-xyz" containing two main subfolders: "htdocs" (the web files to upload) and "documents" (the folder that will contain your user data).
Connect to your server via FTP using a client such as FileZilla, WinSCP, or Cyberduck, using the credentials provided by your hosting provider. Navigate to the public web folder (usually "www", "public_html", or "htdocs"). If you want to install Dolibarr in the root directory, upload the contents of the "htdocs" folder directly into this public folder. If you prefer to install it in a subfolder (for example, /erp), create that subfolder and then upload the contents there.
Also upload the "documents" folder, but ideally OUTSIDE the public web folder for security reasons. On a typical shared hosting plan, place it at the same level as "www" or "public_html". The idea is that this folder should not be directly accessible from the web: it will contain your PDF invoices, attachments, and sensitive data.
Upload time depends on your connection and the number of files: allow 3 to 8 minutes for a complete FTP upload. If your hosting provider offers a file manager with ZIP import, it's even faster: upload the archive directly and decompress it on the server in seconds.
Step 4: Configure file permissions
For Dolibarr to function correctly, certain folders must be writable by the web server. On standard shared hosting, permissions are usually managed automatically. On a VPS or dedicated server, run the following commands via SSH after navigating to the Dolibarr directory:
chown -R www-data:www-data /var/www/dolibarr
chmod -R 755 /var/www/dolibarr
chmod -R 775 /var/www/dolibarr/documents
The "documents" folder must be writable to allow Dolibarr to save your invoices, quotes, and attachments. Similarly, the "conf" subfolder within "htdocs" must be temporarily writable during installation (Dolibarr will generate the conf.php file containing the database connection parameters there).
On a shared server, if you encounter permission errors, contact your hosting provider's support or use the file manager in your control panel to apply 755 permissions to folders and 644 permissions to files.
Step 5: Launch the web installation wizard
Now the magic happens! Open your browser and go to your Dolibarr URL, for example https://yourdomain.com/install/ or https://yourdomain.com/erp/install/ depending on your configuration. The Dolibarr installation wizard will launch automatically.
The first page asks you to choose the installation language (French, of course). Click on "Next step". Dolibarr then performs a series of automatic checks: PHP version, activated extensions, write permissions, and recommended configuration. If all checks are successful, you can continue. If any issues are flagged in orange or red, correct them before proceeding (usually by contacting your hosting provider or modifying your php.ini file).
The next page requests database connection information: database name (dolibarr_prod), server (localhost), username, password, and table prefix (leave the default "llx_"). Select the database type (MySQL/MariaDB or PostgreSQL). Click "Next step": Dolibarr tests the connection and automatically creates all the necessary tables (several hundred tables are created in a few seconds).
Step 6: Create the administrator account
Once the database is initialized, the wizard will ask you to create your super-administrator account. Choose a username that is not obvious (avoid "admin", "administrator" or "root" which are prime targets for hacking attempts), and an extremely strong password of 20 characters or more.
This super-administrator account will have full rights over the application: it will be able to create other users with more limited rights, enable or disable modules, and configure global settings. Keep these credentials safe in a secure password manager (Bitwarden, KeePass, 1Password).
Click on "Next step": your Dolibarr is now installed and functional. You will arrive at the main login screen. Log in with the credentials you just created to access the main interface.
Step 7: Initial post-installation setup
You are now connected to your brand new Dolibarr installation! A few essential actions need to be performed immediately before you can actually start using it.
Go to Home > Configuration > Company/Organization and enter all your company's legal information: company name, address, SIRET number, APE code, intra-community VAT number, share capital, RCS registration number, and logo. This information will appear on all your business documents issued with Dolibarr.
Next, in Home > Configuration > Modules, activate only the modules you need to get started: Third Parties, Products/Services, Sales Proposals, Invoices, Banks, and Calendar are sufficient for most basic activities. You can activate other modules later, as needed.
Configure your VAT rates, payment terms, payment methods, and bank accounts in the Settings menu. Customize your PDF document templates (invoices, quotes) with your logo and colors in Settings > PDF. Set your display preferences, time zone, and default currency.
Secure your Dolibarr installation
Once Dolibarr is operational, several security measures must be put in place immediately to protect your data against attacks and unauthorized access.
First, delete the "install" folder located in the root directory of your htdocs folder. This folder is only used during installation and represents a major vulnerability if it remains accessible. You can also simply create an empty file named "install.lock" in the "documents" folder to block any subsequent access to the installation wizard.
Secondly, you absolutely must enable HTTPS on your Dolibarr server. With Let's Encrypt, obtaining a free SSL certificate takes less than 5 minutes. On shared hosting, your provider usually offers this option with a single click. On a VPS, use Certbot for automatic installation. All connections to Dolibarr must be made via HTTPS to prevent password interception.
Third, configure two-factor authentication (2FA) for your administrator account and all sensitive users. Dolibarr natively offers a TOTP-based 2FA module compatible with Google Authenticator, Authy, or Microsoft Authenticator. This simple measure blocks 99% of brute-force hacking attempts.
Finally, implement a robust password policy in Settings > Security: minimum length of 12 characters, required complexity, periodic expiration, and blocking after several failed login attempts. These settings are essential for a professional environment.
Set up automatic backups
A Dolibarr installation without backups is a ticking time bomb. It is essential to configure daily backups from day one. Dolibarr includes a Backup module that allows you to manually export the database and the documents folder.
For complete automation, create a cron job on your server that runs a MySQL dump every night and copies the documents folder to a remote location (external cloud, second server, NAS). Keep several generations of backups (at least 7 days, ideally 30 days) so you can restore a previous state in case of a problem.
Regularly test the restoration of your backups in a test environment: an untested backup is a useless backup. This is a golden rule too often neglected until disaster strikes.
Common mistakes during installation
Here are the most common errors encountered during a Dolibarr installation, and their quick solutions:
• Error 500 or blank page: check the PHP version (8.1 minimum), increase memory_limit in php.ini, consult the Apache error log to identify the precise cause.
• "Cannot connect to database": Check the database name, username, password, and host. Some hosting providers use a specific server name instead of localhost.
• Permission errors: ensure that the "documents" and "htdocs/conf" folders are writable by the web server user.
• Missing modules: PHP extensions not installed (gd, curl, mbstring, intl, xml). Contact your hosting provider or install them via apt on a VPS.
• Timeout during table creation: increase max_execution_time to 600 seconds and restart the installation.
Conclusion: your Dolibarr is ready to transform your management
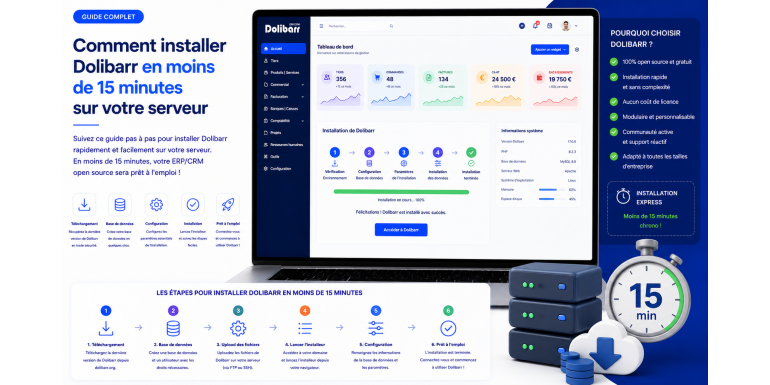
You've just accomplished something many mistakenly believe is reserved for developers: installing a complete professional ERP/CRM on your own server in just a few minutes. Your Dolibarr is now up and running, secure, and ready to handle your customers, products, invoices, and all your sales and accounting activities.
The actual installation time, excluding initial setup, is generally between 10 and 15 minutes on a properly configured hosting environment. The critical steps (download, database, upload, web wizard, admin account creation) follow each other quickly once you have your login credentials and a compatible environment.
The next steps involve configuring Dolibarr to suit your business: creating your first clients, importing your product or service catalog, setting up your quote and invoice templates, training your staff, and gradually exploring the many available modules. Take your time to discover the tool without rushing: a good initial setup will save you a lot of time later on.
Remember that the Dolibarr community is extremely active and supportive: if you have any questions, the official forum, French-speaking Facebook groups, and numerous YouTube tutorials will quickly provide answers. And if you prefer assistance, specialized Dolibarr service providers are available throughout France to help you get the most out of your new installation.
Welcome to the Dolibarr ecosystem: a world where software freedom, data control, and operational efficiency combine daily to drive your business forward. Your installation in under 15 minutes was just the first step in a professional journey that can support you for many years to come.