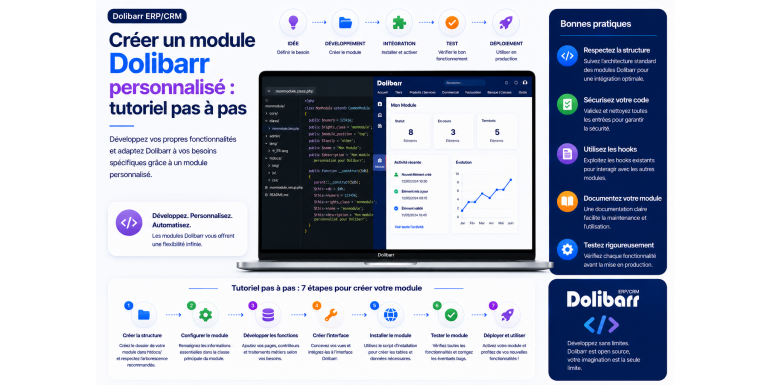
Creating a custom Dolibarr module: step-by-step tutorial
Do you want to extend Dolibarr without touching the core of the software? Follow this complete tutorial to create your own module, from activating the Module Builder to saving the first business object in the database.
Development · Dolibarr · PHP • Intermediate level
Summary
1. Why create a custom Dolibarr module?
2. Prerequisites before starting
3. Understanding the architecture of a module
4. Step 1: Activate the Module Builder
5. Step 2: Generate the module skeleton
6. Step 3: Customize the descriptor
9. Step 6: Create a business object and its table
10. Step 7: Manage translations
11. Step 8: Activate and test the module
12. Going further: hooks, triggers and APIs
13. Good development practices
14. Debug and resolve common problems
15. Frequently Asked Questions
Dolibarr owes much of its success to its modular architecture. Rather than imposing a monolithic block, it offers dozens of modules that can be activated or deactivated as needed. And above all, it allows developers to write their own. This is the key to adapting the ERP to very specific business needs without ever modifying the original source code—which guarantees seamless updates.
In this step-by-step tutorial, you will learn how to create a custom Dolibarr module from scratch. We will use the Module Builder , Dolibarr's built-in code generation tool, which automates much of the tedious work. By the end, you will have a fully functional module with its own menu, permissions, a business object linked to a database table, and translations.
This guide is for developers with a basic understanding of PHP. No need to be an expert: we explain each concept as we go. Grab your favorite code editor, launch your Dolibarr development environment, and let's get started.
Why create a custom Dolibarr module?
Before writing a single line of code, it's helpful to understand what a module actually allows you to do. A Dolibarr module isn't a simple script: it's a full-fledged extension, capable of deep integration into the application.
In concrete terms, a custom module can add new database tables, create its own input screens, insert menu entries, add tabs to existing records (invoices, products, third parties…), define new permissions, execute code automatically on events using triggers, or even inject itself into existing code via hooks.
The main advantage can be summed up in one sentence: you extend Dolibarr without touching the core . Your developments reside in a separate directory and survive version upgrades. This is the fundamental difference between a clean module and a hack in the source code, which would be lost with the first update.
Prerequisites before starting
A well-prepared environment will save you a lot of frustration. Here's what you need.
Basic knowledge
A strong command of PHP is essential, as well as knowledge of SQL for data tables and some HTML/CSS for screens. Knowledge of object-oriented programming is a plus, since Dolibarr's business objects are based on classes.
The development environment
Install a dedicated Dolibarr instance for development, separate from your production environment. Use a user-friendly code editor such as Visual Studio Code or PhpStorm, and ensure that common PHP extensions (pdo, gd, intl, etc.) are installed on your server.
Enable developer mode
The Module Builder only appears in developer mode. Open your htdocs/conf/conf.php file and take the application out of production by adding or modifying this line:
$dolibarr_main_prod = 0;
Remember to set the feature level to "developer" in the display settings to unlock advanced tools. Once these settings are in place, the development functions will become accessible.
Important: Never work directly on your production Dolibarr. Developer mode displays sensitive information and activates tools that have no place on a live site. Reserve these settings for a test environment.
Understanding the architecture of a module
A Dolibarr module follows a well-defined file structure. Understanding this structure will help you navigate the generated code and know where to add your customizations.
The file tree
An external module is placed in the htdocs/custom/ directory . Here is what the typical directory structure of a module named mymodule looks like :
htdocs/custom/mymodule/
├── core/
│ └── modules/
│ └── modMyModule.class.php (the descriptor)
├── class/ (business objects - CRUD classes)
├── sql/ (table creation scripts)
├── admin/ (the configuration page)
├── lib/ (utility functions)
├── langs/ (translation files)
│ └── fr_FR/
└── mymodule_index.php (the main page)
The descriptor file, the key component
The file modMonModule.class.php , located in core/modules/ , is the brain of the module. Dolibarr reads this file to determine your module's name, its function, its permissions, the menus it adds, and the tables it installs. It extends the DolibarrModules class . Without this file, Dolibarr simply won't recognize your module.
Step 1: Activate the Module Builder
Since Dolibarr version 9, the recommended method for creating a module is to use the Module Builder , which is included by default. Go to Home → Configuration → Modules/Applications , find "Module Builder" in the list, and activate it.
Once activated, a new icon (often represented by a small insect or a gear) appears in the top right corner of the screen. This opens the Module Builder interface, technically accessible via the generation tool's address. It is from this interface that all the magic happens.
Step 2: Generate the module skeleton
In the Module Builder interface, click the button to create a new module. A window will ask you for some basic information: the module name (for example, MyModule), its category, its description, and its publisher.
Confirm, and the Module Builder does most of the work: it copies the template files located in htdocs/modulebuilder/template , performs the necessary string replacements, and creates the complete directory structure of your module in htdocs/custom/monmodule/ . In a few seconds, you get a valid module, empty but immediately recognized by Dolibarr.
Tip: The Module Builder generates a modulebuilder.txt file in the module's root directory. Do not delete it while you are developing: it allows the tool to continue editing the module via the graphical interface. You will only remove it at the time of final distribution.
Step 3: Customize the descriptor
Open the generated descriptor in your editor. You will find many properties to adjust. Here are the most important ones, as they appear in the class constructor:
public function __construct($db)
{
$this->db = $db;
$this->numero = 500000; // unique module identifier
$this->rights_class = 'monmodule'; // permission prefix
$this->family = 'other'; // display family
$this->name = 'MonModule';
$this->description = 'Custom management for my business';
$this->version = '1.0';
$this->picto = 'generic'; // module icon
}
The main point to be aware of concerns the module number , which must be unique to avoid any conflicts with other modules. The Module Builder usually assigns a random identifier from a range reserved for external modules. Avoid changing it arbitrarily. The version property is used to track updates, and the description is displayed in the module list.
Step 4: Define permissions
Permissions control who can do what in your module. They are declared in the descriptor's rights table. Each entry defines an identifier, a label, and the type of action it allows (read, create, delete, etc.).
$this->rights = array();
$r = 0;
$this->rights[$r][0] = 500001; // unique permission id
$this->rights[$r][1] = 'Read records';
$this->rights[$r][4] = 'read';
$r++;
$this->rights[$r][0] = 500002;
$this->rights[$r][1] = 'Create or modify';
$this->rights[$r][4] = 'write';
When the module is activated, these rights are automatically saved in the llx_rights_def table . You can then assign them to your users and groups from the usual administration interface. Remember to check these permissions in your code for every sensitive action: it's a basic security best practice.
Step 5: Add a menu entry
For your module to be accessible, it needs at least one menu item. This is declared in the menu table of the descriptor. You specify the menu type (left or top), its title, the target URL, and the permission required to display it.
$this->menu[$r++] = array(
'fk_menu' => 'fk_mainmenu=mymodule',
'type' => 'left',
'title' => 'List of elements',
'url' => '/custom/mymodule/mymodule_list.php',
'langs' => 'mymodule@mymodule',
'perms' => '$user->rights->mymodule->read',
'position' => 100,
);
The permissions field ensures that only authorized users see the menu entry. Once the module is reactivated, your menu appears in the sidebar, ready to link to your screens.
Step 6: Create a business object and its table
This is the core of a module that manipulates data. The Module Builder allows you to add an "object" in just a few clicks, from the dedicated tab in its interface. You define the object's name and the list of its fields (text, number, date, link to another object, etc.).
Based on this definition, the tool generates several files at once: the DAO/CRUD class in the class/ folder (with ready-to-use methods for creating, reading, updating, and deleting a record), the SQL script for creating the table in sql/ , as well as the list and record pages. This represents a considerable time saving.
The generated SQL script looks like this, with the columns corresponding to your fields:
CREATE TABLE llx_monmodule_element (
rowid INTEGER AUTO_INCREMENT PRIMARY KEY,
ref VARCHAR(128) NOT NULL,
label VARCHAR(255),
datec DATETIME,
fk_user_creat INTEGER,
status INTEGER DEFAULT 0
) ENGINE=innodb;
Important note: all tables in a Dolibarr module are prefixed with llx_ (or the prefix defined during installation). Adhere to this convention: it prevents name collisions and ensures consistency with the rest of the database.
Step 7: Manage translations
Dolibarr is multilingual, and your module must be too. Labels are stored in language files located in langs/fr_FR/ . Each file associates a key with a translated text, in the form of key = value pairs:
# file langs/fr_FR/monmodule.lang
ModuleMonModuleName = My Module
ModuleMonModuleDesc = Custom management for my activity
MonModuleList = List of elements
NewElement = New element
In your code, you never hardcode the text: you call the translation key. Dolibarr then handles displaying the correct language according to the user's preferences. Remember to create at least French and English versions of the files for wider distribution.
Step 8: Activate and test the module
The moment of truth. Go to the list of Dolibarr modules: your module is now listed. Activate it. At this point, Dolibarr executes the SQL scripts, creates the tables, saves the permissions, and installs the menus.
Next, navigate to your new menu entry, create a first record, modify it, and delete it. Verify that the data appears correctly in the database. If something is amiss, developer mode and Dolibarr's logs are your best allies for diagnosing the problem.
Debugging tip: If you encounter an error after modifying the descriptor, disable and then re-enable the module to force Dolibarr to reread the configuration and rerun the installation scripts. Many problems are resolved with this simple step.
Going further: hooks, triggers and APIs
Once the basics are acquired, Dolibarr offers powerful mechanisms to integrate your module in depth.
The hooks
Hooks are injection points that allow you to add or replace code in specific locations within Dolibarr, without modifying the core. You declare the contexts you're interested in using the `module_parts` property of the descriptor:
$this->module_parts = array(
'hooks' => array('invoicecard', 'thirdpartycard')
);
You then write a hook class whose methods will be called automatically when Dolibarr reaches these contexts. This is ideal for enriching existing screens with your own information.
Triggers
Triggers execute code in response to a business event: the validation of an invoice, the creation of a third party, the deletion of a product… Your module can thus react automatically, for example to synchronize data with an external system or send a notification.
The REST API
If your business object needs to be accessible from outside the system, the Module Builder can generate a dedicated REST API. This allows you to expose your data to other applications, while respecting the defined permissions. This is a major advantage for connecting Dolibarr to your software ecosystem.
Good development practices
Following a few principles will help you avoid many pitfalls and make maintaining your module easier over time:
• Never modify the kernel. All your code remains in the custom directory. This guarantees painless updates.
• Check permissions everywhere. Before each sensitive action, verify that the user has the corresponding right.
• Escape the data. Systematically sanitize user input to prevent SQL injections and XSS vulnerabilities.
• Version your code. Use Git from the start to track your changes and collaborate smoothly.
• Document and translate. Clear labels and comprehensive language files make your module usable by others.
• Test before distributing. Enable and disable your module on a clean instance to validate the installation and uninstallation.
Debugging and resolving common problems
Even if you meticulously follow each step, you'll inevitably encounter unexpected behavior sooner or later. Here's how to stay in control and effectively diagnose the most common problems.
First thing to do: enable Dolibarr's logs. In developer mode, you can increase the log detail to see precisely what the application is doing. Most errors leave a clear trace, much more useful than a blank screen. Also, remember to check the PHP error log, which captures unhandled anomalies.
A module that doesn't appear in the list almost always indicates a problem with the file descriptor: a PHP syntax error, a class name that doesn't match the file name, or an incorrect location in the directory structure. Verify that the file is named according to the expected convention and that it's located in the correct subdirectory.
If your tables are not created upon activation, check your SQL scripts: a missing semicolon or syntax incompatible with your database is enough to block the installation. Deactivate and then reactivate the module to restart the procedure once the correction has been made.
Good habit: work in small iterations. Change only one thing at a time, then test it. When something breaks, you immediately know which change is responsible—whereas a large number of changes make diagnosis much more difficult.
Frequently Asked Questions
Is it mandatory to use the Module Builder?
No, you can write everything by hand by copying the descriptor template. However, since Dolibarr 9, the Module Builder is the recommended method: it generates clean and compliant code, saves you valuable time, and reduces errors. You can then manually edit the generated files.
Where should I place my module: in the custom directory or in the root directory?
For an external module, always place it in htdocs/custom/ . The root directory is reserved for modules intended to become official Dolibarr core modules. The custom directory ensures separation from the core.
Will my module survive Dolibarr updates?
Yes, as long as you respect the golden rule: never modify the kernel code. Since your module lives in its own directory and uses the official mechanisms (hooks, triggers, descriptor), it remains compatible through version upgrades, provided you keep up with API updates.
Can I distribute or sell my module?
Absolutely. Many third-party modules, both free and paid, are available on the official marketplace. Just be sure to comply with the Dolibarr license and provide clear documentation and any necessary translations.
Conclusion
Creating a custom Dolibarr module is easy. Thanks to the Module Builder , the core structure is generated in just a few clicks, leaving you to customize the descriptor, declare your permissions and menus, and define your business objects. By following the steps in this tutorial, you now have a solid foundation for building custom extensions.
The strength of this approach lies in its respect for the software: all your work remains isolated in the custom directory, protected from updates. You can adapt Dolibarr to your most demanding needs without ever compromising its long-term viability.
The best way to progress now is to practice. Launch your development environment, generate your first module, add an object and a menu to it, and gradually explore hooks, triggers, and the API. Each module you build will make you more comfortable with Dolibarr's architecture—and open the door to almost limitless possibilities.